- Time flies when you have a lot of things to do and no time to do them. May is coming to an end, leaving us only two weeks before school year is over, and I haven't finished any of my goodbye gifts for my students. The PowerPoints are coming along and so are the year books, but there is a huge amount of paper to be scanned and filled. I am starting to get stressed.
- The idea of a graduation yearbook came to me a couple of years ago, when I found one of my own primary school yearbooks in one of my boxes, in my parents' flat. It was a simple, cheap, blue notebook, filled with photos, letters, stickers, drawings and all of my friends' colourful handwriting. I simply knew I had to do something similar for my students. Of course things change and so I had to make the yearbook a little bit more appealing to my students. So I came up with the idea of a digital version of a yearbook. What follows is a description of how I organised the yearbook and how we came to complete it in our classrooms.
- To begin with I made the pages' templates, a simple PDF document containing the cover, question and dedication page and the inventory. The children simply signed the page to make the cover.
Part One: Questions
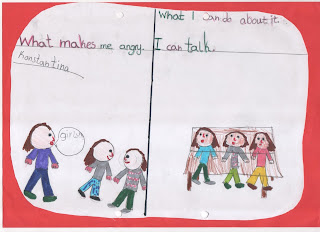
- There are fourteen simple and straightforward questions, just like in my school Yearbooks. The questions were written by the children on copies of the following page. This year I included the following questions:
1. Who is your favourite singer?
2. Draw a picture of yourself.
3. Which is your favourite book?
4. Who is your favourite actor?
5. Which is your favourite band?
6. How do you feel about leaving our school?
7. Which is your favourite film?
8. Describe your happiest moment in our school.
9. Which is your favourite colour?
10. Which is your favourite animal?
11. Which is your favourite song?
12. Name your favourite place.
13. Love is...
14. Friendship is...
 |
| Question Page Template |
Part Two: Dedication Pages
- The questions comprise the first part of the Yearbook. The second part is more fun. It contains 44 pages, two for each child. The children wrote their names on the top of the page and decorated their personal pages as they wished. Some children needed more than two personal pages, which sky- rocketed the amount of pages in our Yearbook.
 |
| Decorating Our Pages |
 |
| Sample Personal Page |
Part Three: Inventory
- The last section of the Yearbook is the inventory, through which children can keep in touch.
 |
| Inventory Template |
Step Two
- The second step was more tricky. All children had to answer all the questions, not using their own name but a pseudonym. When we finished the questions, we moved on to the more fun part, signing our classmates' personal pages. It was so sweet to read some of the dedications they wrote to their friends. One has to bare in mind that the children in question, have been classmates for more than 6 years, which for them is practically all their lives.It is also important to mention that I told my students I would not correct any mistakes they might make. It is their Yearbook, not a test.
- I kept track of who had answered which question, using a grid.
Step Three
- The third step is the most tedious one: I have to scan all 150 pages of our Year book. Then I have to use a Flipbook maker, in order to make it into a flipbook. After the file is created, I have to burn 24 CDs one for each child. I will let you know when that happens...
 |
| Click here: End Of Year PowerPoints |


